

A Barn Owl Nest Box On A Tree
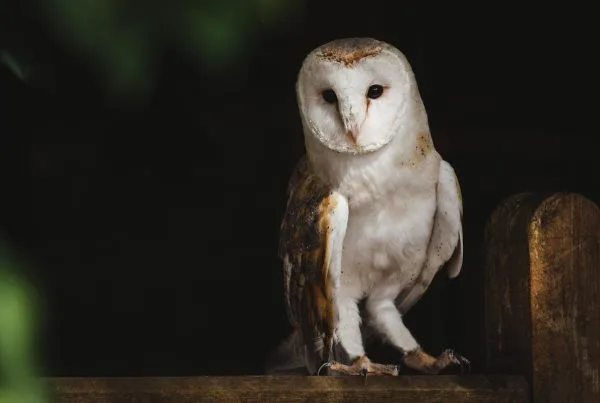
Due to their roles in controlling rodent populations, barn owls also contribute to the health of ecosystems. But their numbers are declining because of habitat loss. One of the best ways for them to stay alive is to make a safe nesting spot. This also indicates the need for barn owl nest boxes, which mimic natural tree holes and serve as a great breeding space.
When designing your plan for a nest box, its important to especially note the importance of a water proof design to prevent the nest material from soaking up moisture and harming owl eggs/chicks from rainwater. This means water cannot degrade the nesting material, and as a result harm the owl’s eggs and chicks. These will have sloped bottoms, back-set entrances and waterproof roofs to protect the inside of the box from rain.
This guide summarizes the key steps and materials you need to build a nest box.
Materials Needed
Barn owl nest box needs a tough and long-lasting material that will last for many years. Below is a list of what you will need:
Plywood:
It is recommended that you use up to 9mm exterior-grade plywood for this, Pre-treated is best, to resist damage from the weather. This forms the main body of the nest box allowing a nice warm space for the owls.
Batten Strips:
Batten strips: These are thin, typically rectangular boards. They can be used to reinforce a structure or as load-bearing members. As an example, with a barn owl nest box, they help to structurally support the frame that the plywood panels will attach to.
If you are following my plan you will need about 6 meter of batten wood (pressure treated preferred thin batten) 50x25mm suggested.
Screws and Nails:
You will use approximately 100 screws in different sizes to hold the parts together. The nails might also add some extra strength to the structure.
Roofing Felt:
Roofing felt also has water-repellency properties, so it’s used to protect the nest box from moisture and water. Use felt – Ideally size 62x57cm (We recommend a water-resistant roofing felt) to ensure the owls nest is maintained dry and safe.
Additional Tools
- Here are other tools you can use:
- Bevel for sharp angles.
- Sealant for joints that is weatherproof.
- The parts are assembled using a nail gun or hammer.
- (Shouldn’t a saw, measuring tape and drill also be considered?)
Key Design Features
A good barn owl nest box must serve the needs of barn owls and protect against particular environmental crosses. In this generation, as follows the mandatory structure elements;
Waterproof Structure
A deep inlet keeps the rain from entering the box. It needs to hang over the edges to cover more. A sloped base encourages any water that does seep in to drain out swiftly, keeping the inside dry.
Ventilation and Drainage
Having air circulation keeps the place from becoming too hot (30 degrees Celsius is as high a temperature as owls can shiver) and damp (wet birds can’t fly or perch), and comfortable for the owls. Make sure there are gaps at the bottom for drainage to release water, which reduces the risk of moisture.
Entrance and Floor Depth
In order to protect the owl chicks the nest box should have a measurement of at least450mm from the entrance hole to the floor of the nest box. This depth keeps the chicks from tumbling out or climbing out before their wings are fully formed. It simulates the conditions of a natural nest, providing them with ideal conditions for their growth and development, aiding them in escaping the risk of exposure to predators or toxic materials until they are mature.
Inspection Panel
The addition of a removable panel makes inspection and cleaning easier. This helps to check the nest and conditions for maintenance without disturbing the owls too much.
How to Build a Nest Box: A Step-By-Step Guide
Some good measurements and solid assembly, ensuring it’s waterproof. Here are the steps you’ll want to follow to create a durable and functional nest box:
Cutting Plywood and Battens
- Measure and cut the plywood and batten strips to the right sizes.
- The Barn Owl Trust website has plans and diagrams.
- Make cuts that fit together snugly, this leads to stronger and more enduring joints.
Installing Support Battens
Add battens to the front and back panels. These battens provide support for the floor structure and inspection panel. Nail or screw them down firmly to hold them in place.
Applying Sealant
Apply weatherproof sealant to all batten seams. The step is crucial in maintaining the waterproof nature of the box. Next, allow the sealant to dry prior to assembly.
Assembling Sides and Floor
Start with attaching the side panels to the floor, in several stages. All the pieces must be nailed or screwed up very tightly so that there is no chance of water or wind entering the house through these features. Eventually, both sides are attached to the structure and the top battens add further rigidity to the structure. Thereby, it will not put on over some time.
Roof Waterproofing
If you have one of the roof widths, cut the roofing felt to that width and cover the top panel with it. Seal the perimeters with a flexible weather-resistant compound to keep water out. Attach and staple or nail down the felt so that in inclement weather it does not detach and fall away. In this process, it is essential to make sure the interior does not become wet and to create a dry nesting environment for barn owls.
Installing Hangers
Installation approach varies based on the tree design and other resources available. Here is how to safely install nest box hangers:
Choosing Installation Method
Hangers must fit onto trees in order to fasten the nest box securely. The decision will depend on the height of the tree trunk and materials at hand:
- Weather-proof Recycled Plastics Hangers: They are long-lasting and eco-friendly. Because plastic hangers can flex a bit to match the contour of the tree, they work especially well for trees with irregularly shaped or curved trunks.
- Wooden Hangers: Again cheap and easy to make. Then they are perfect for straight or forked tree trunks where they provide good and secure anchoring.
Hanger Installation Steps
- Here is a step guide on how to take a nest box and install hangers on the back bottom.
- Screw hangers onto the back panel to the top of the nest box.
- Use screws or nails to secure the hangers to the walls, evenly spacing them for balance.
- Support brackets should be put at the bottom of the box for additional stability. They also reinforce the nest box, particularly if located in a place with gusty winds.
- While carrying the box, look at the hangers, they should be tight enough to support the weight without vibrating or swaying.
Suggested Height and Position
Building a nest box is as important as putting it in the right position. So proper placement will ensure that the box remains safe and usable:
- Tree Fork Install: Once the box sits in a tree fork, it is stable and has limited movement in wind.
Hence, the maximum height will be 10-20 feet beyond the floor, with its contents out of the reach of animals wishing to escape, but could be obtained by inspection.
- Entrance Orientation: The entrance should be positioned to away from prevailing winds and direct sunlight to ensure the interior of the owl house is comfortable, safe and secure.

A Complete Guide To Building And Installing
Additional Considerations
A few more things to keep in mind:
Using the Inspection Panel
Keep in mind the need to keep the panel clamped tight enough to prevent water seepage, but not so tight that the panel is disturbed during regular use. When it’s not breeding time, you can open the panel up and look inside for damage, debris or wear. This ensures the nest box remains functional but will not cause undue disturbance to owls.
Maintenance Tips
A bit of maintenance will keep the nest box up longer and provide a safe home for the owls.
- Watch for Waterproofing: Take a close look at the roof, joints, and sealant after the rainy seasons have passed, looking out for spots that might have leaked or ripped.
You may also need to reapply waterproofing: Ensure Structural Integrity Each year you should check for looseness or damage in the screws, hangers, and battens of the box. As you squeeze, correctly replace components.
- Wash the interior: After each breeding season, take out old nesting material and garbage. This prevents the growth of pests and mold.
Conclusion
Just from a procect perspective, building and installing a barn owl nest box to increase wildlife protection is a great addition to improve nature in our neighbourhoods. By following the steps outlined here and using quality materials, you will discover a safe, weather-resistant, and long-lasting home for these delightful birds.
With some common sense care, your nest box will be a home for many years to come. Every step taken to save barn owls is also a step taken to restore equilibrium in the ecosystem they inhabit.

MD Imdadul Haque is the founder of BirdzFly, a research-backed resource on North American backyard birds. Drawing on years of independent study into bird identification, behavior, and migration patterns, he writes in-depth guides designed to help US birders understand the species in their own backyards — from common feeder visitors to seasonal migrants passing through.